“`html
Why Figured Wood Tears Out in Planers
Wood planer tearout on figured wood is one of those problems that feels like it’s happening to you personally when you’re staring at a ruined board. I learned this the hard way years ago when I fed a piece of curly maple through my DeWalt DW735 without thinking much about it—came out looking like a cat had clawed it. The difference between figured wood and straight-grained stock isn’t subtle, and it’s not something you can ignore.
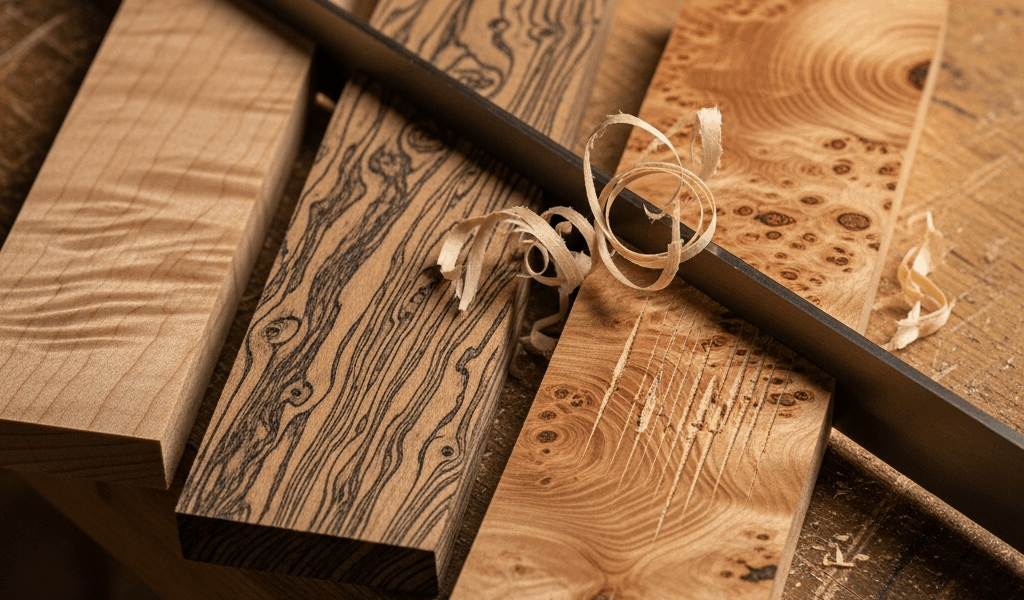
Here’s what’s actually happening inside the wood. Figured wood has gotten complicated with all the grain variation flying around. Curly maple, spalted birch, burl walnut, tiger-striped ash — these aren’t your standard pine boards. The grain doesn’t run in one neat direction. Instead, it reverses. Think of curly maple: those waves frozen into the surface? They represent grain changing direction every few millimeters. A planer blade cuts wood by shearing it cleanly when the grain slopes away from the blade’s path. When grain reverses or interlocks, the blade is working against the grain on half your passes, trying to push fibers backward instead of shaving them cleanly. That’s when the blade catches and rips out chunks instead of taking a whisper-thin shaving.
Spalted wood complicates this further. The decay lines and mineral streaks create brittleness and grain that’s unpredictable. Burl wood — all those swirling grain patterns — is basically the worst case scenario. The grain runs in every direction at once.
In essence, figured wood is inherently riskier than flat-sawn cherry or poplar. But it’s much more than that. No matter how sharp your blade is or how careful you are, you can minimize tearout. You cannot eliminate it entirely without changing your approach completely.
Test Your Grain Direction Before You Plane
Probably should have opened with this section, honestly. Testing grain direction takes five minutes and saves hours of cleanup and frustration.
Start with your hand. Get a sharp hand plane — even a low-angle block plane works — or a cabinet scraper. Pick a corner of your board and plane a test stroke in one direction. Then turn the board around and plane from the opposite end. One direction will shave cleanly. The other will catch and tear. Whichever direction is smooth is your answer: that’s the direction the grain wants to go.
If you don’t have a hand plane, use visual inspection. Look at the edge of your board and sight along the grain from low angles. Figured wood often shows the grain structure clearly if you look at it right. The grain should slope upward as you move across the board in the direction you want to plane. If it slopes downward, you’re planing against the grain.
Mark it with a pencil arrow on both ends before you touch the planer.
Now here’s the problem nobody talks about. Figured wood often has grain running both directions on the same face. Curly maple is notorious for this. Half the board wants to be planed one way, half the other way. You can’t win. In this case, you have to pick your poison — plane in the direction that handles the worst tearout patterns, then sand out the lesser damage. Accepting that some tearout will happen is part of working with figured wood.
Adjust Feed Rate and Blade Height for Figured Wood
Feed rate is your second lever. Most people run their planers at the fastest setting and feed boards through like they’re clearing a conveyor line. With figured wood, stop.
Slow your feed rate down. Way down. If your planer has variable speed or a feed rate dial, drop it by at least 50 percent from your normal settings. Some woodworkers I know go slower still — feeding figured wood by hand-crank if their planer allows it, or using powered models with adjustable feed speeds like some Grizzly or JET machines set to the minimum crawl.
Why does this work? A slower feed rate means each part of the blade gets more time to do its job before the board moves. Less aggressive engagement equals less violent fiber tear-out. The blade does more cutting and less ripping.
Depth of cut matters just as much. For figured wood, take passes of 1/32 inch or less — not 1/8 inch, not 3/64 inch. Thinner. A lot of people recoil at this because it means more passes and more time. But that’s the trade-off you accept when you work with figured wood. A curly maple tabletop that takes 20 minutes to surface properly beats a ruined one.
Some machines let you dial this in precisely. Others require you to shim the infeed table slightly between passes. Know your planer’s limitations before you start. On a basic two-knife benchtop planer, you’re estimating. On machines with digital readouts or sophisticated depth controls, you can hit 1/32 inch consistently.
The combination — slow feed rate plus shallow depth — keeps the blade from catching the grain violently. It’s not glamorous. It’s not fast. But it works.
When Sharp Blades and Technique Aren’t Enough
Blade sharpness is your first pillar. A dull blade turns cutting action into hammering action. With figured wood, a dull blade will tear out even on grain-favorable passes. I’ve said it and I’ll say it again: keep your blades sharp. If you can’t sharpen them yourself, have them professionally honed every few boards when you’re working with figured stock.
But there’s a ceiling to what technique alone can achieve. Some figured wood will tearout no matter what you do with a standard two-knife benchtop planer. That’s what makes upgraded equipment endearing to serious woodworkers.
This is where you consider upgrades. Spiral cutterheads with inserts at multiple angles — like the Byrd Shelix heads that fit many planers — genuinely reduce tearout on figured wood. The multiple cutting angles approach the grain from more favorable angles simultaneously. You’ll pay $300 to $500 for a retrofit kit, but on difficult wood it’s worth it. Carbide inserts also stay sharper longer than high-speed steel blades.
Four-square blades let you get more passes out of each blade before sharpening, but they don’t solve the tearout problem itself. They’re a convenience, not a cure.
The honest truth is this: some figured wood is too much even for upgraded equipment. Heavily spalted maple that’s partially rotted, for instance. At that point, hand planing the surface by hand or scraping and sanding becomes your real option. You won’t plane it smoothly. A sharp cabinet scraper or a hand plane with proper grain-direction finesse will give you better results.
Quick Checks Before You Start Planing
- Blade sharpness: Run your thumb lightly perpendicular to the edge — not along it. Should feel sharp enough to shave arm hair. If you’re uncertain, replace or hone.
- Grain direction confirmed: Pencil arrow marked on both ends. Hand-plane test completed or visual grain inspection done.
- Pass direction marked: Know which way the board is moving through the planer before you start.
- Depth set to 1/32 inch or less: Check and double-check on a test piece of scrap figured wood if you have it.
- Feed rate reduced: Dial down to minimum or near-minimum speed if adjustable. Feed by hand if possible.
- Board support: Make sure infeed and outfeed tables are aligned and supporting the board flat. Unsupported edges dig and catch.
These five steps address grain direction, blade sharpness, and feed rate — the three pillars that actually matter for figured wood.
Running through this mental checklist takes maybe two minutes. Fixing a board of curly maple or spalted walnut that’s been torn to pieces takes a belt sander, sandpaper, a lot of cursing, and sometimes losing the whole project. Don’t make my mistake.
“`


Stay in the loop
Get the latest the home woodshop updates delivered to your inbox.