“`html
Signs Your Clamp Pressure Is Too Low
I spent an entire Saturday rebuilding a walnut bookcase because I didn’t understand clamp pressure. The joints looked fine when I removed the clamps. By Tuesday, they were separating. Gaps appeared where the rails met the stiles—hairline at first, then wide enough to see daylight through. The glue had set, but the joint itself was weak. Twist it even slightly and it would snap.
That’s the most obvious symptom: gaps appearing after clamp removal. Your joint looks good under pressure, then hours later, when the adhesive has cured, it shrinks back and you see separation. Not acceptable.
Another red flag is glue starvation. This happens when insufficient clamping pressure prevents the glue from being forced into the wood grain. Instead of a consistent bead of glue squeezing out along the entire joint line, you see patchy squeeze-out or none at all. The glue stays on top of the wood rather than saturating it. When you break the joint open, the wood looks pale and dry — starved for adhesive. The glue line itself is incomplete, with air pockets where wood should have bonded to wood.
Weak joints that break under load are the practical consequence. I’ve had mortise-and-tenon joints snap at the glue line with just hand pressure. The wood itself stayed intact. The bond failed. This tells me the clamping pressure during assembly wasn’t sufficient for the wood species and joint type I was using.
Sometimes you won’t see a visible gap. The joint feels soft or flexible. Press on it sideways and it moves. That’s partial failure — the glue set, but without adequate pressure during curing, the mechanical bond never fully developed.
How to Test If You’re Applying Enough Pressure
Probably should have opened with this section, honestly. Testing is simple and requires no fancy tools.
Start by understanding what pressure you’re actually applying. Most woodworkers eyeball this and get it wrong. Here’s the practical method: measure the depth of your clamp’s throat (the distance from the screw to the beam). Measure the surface area of the joint you’re clamping — let’s say a 1.5-inch-wide board edge being glued to another 1.5-inch edge, with a joint length of 24 inches. That’s 1.5 × 24 = 36 square inches of glue surface.
For softwoods like pine or poplar, aim for roughly 100–150 PSI (pounds per square inch) of clamping pressure. Hardwoods like oak or walnut need 150–250 PSI. Dense exotics might demand 250–300 PSI.
To calculate actual pressure, take a clamp with a 3-inch throat depth. Tighten it with moderate hand pressure — not gorilla-strength — and you’re probably applying around 200–300 pounds of clamping force. Divide that by your joint area: 250 pounds ÷ 36 square inches = 6.9 PSI. That’s far too low. You’d need to add more clamps or use cauls to spread pressure more evenly.
The squeeze-out test is where theory meets reality. When you tighten a clamp and glue starts escaping the joint, watch where it comes out. Adequate pressure produces a consistent bead of glue along the entire length of the joint. If you see glue on one end but not the other, or if it appears intermittently, you don’t have even pressure. The joint will cure unevenly.
A proper squeeze-out bead should be about 1/16 inch thick and visible all the way along. If you have to hunt for glue or wipe away just a tiny bit, you’re probably under-clamped. That joint is starving.
Common Pressure Problems and How to Fix Them
Not enough clamps is the most common culprit. Woodworkers underestimate how many clamps they need. Use one clamp for every 12 inches of joint length — that’s the rule of thumb I follow. A 24-inch edge joint should have at least two clamps, preferably three. Space them evenly. Only one clamp on a long joint means the pressure will be highest near the clamp and drop to nearly zero at the far end.
Uneven pressure distribution happens when clamps are angled or when cauls are warped. An angled clamp pulls the joint sideways instead of pressing straight together. Use straight cauls (parallel pieces of hardwood clamped on top and bottom of your assembly). The cauls distribute the clamp’s point load across a wider area. A 2×4 caul running the full length spreads pressure much more evenly than clamping directly to the wood.
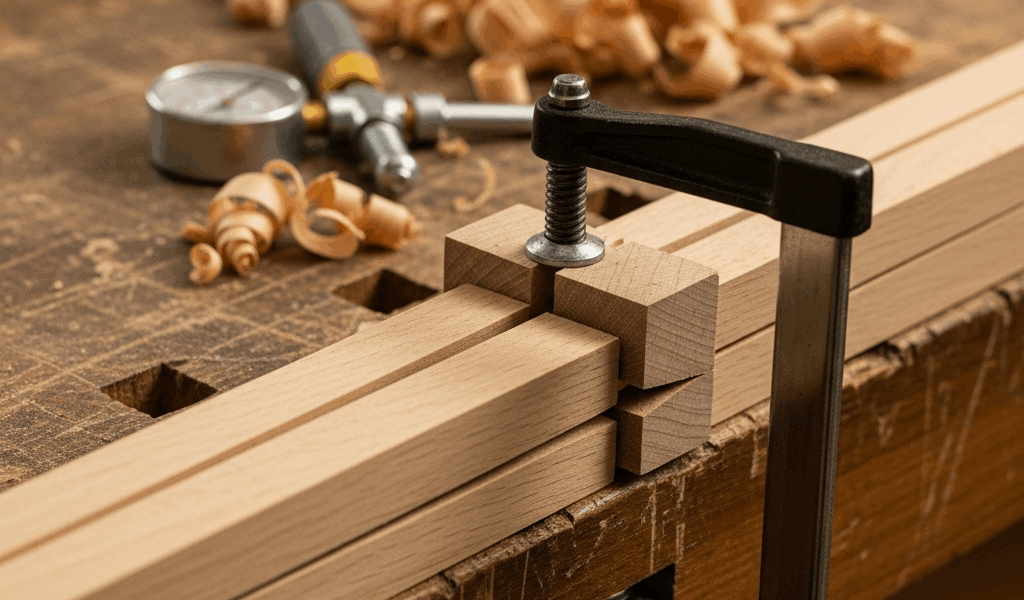
Clamp slippage is frustrating — you tighten down, glue goes everywhere, and by the time you let go, the clamp has slipped a half-inch up the wood. Use clamp blocks, which are small wood scraps glued or clamped perpendicular to the work, with the clamp pressing against the block instead of the work itself. This prevents the clamp jaw from sliding along the grain.
Parallelogram racking occurs when clamps pull a rectangular assembly out of square. Add a diagonal cross-brace or use alternating clamps (one on top, one on the bottom) to keep everything square during curing. Tighten in sequence: start with the center clamp, then work outward. Pressure propagates evenly from the middle of the joint outward.
Warped or unflat cauls are invisible sabotage. A caul that looks straight to the eye might rock slightly. Place it on a known flat surface (a table saw top, a known flat board) before using it. If it rocks, plane or sand it flat. A 2×4 that’s twisted will deliver good pressure at two contact points and nothing at the others.
Clamp Types and Their Pressure Limits
Bar clamps are the workhorses. They deliver solid, even pressure if used correctly, but they’re prone to slippage if the head isn’t tightened properly. The screw threads on bar clamps can strip if over-tightened, so moderate hand pressure is the practical limit — which often isn’t enough for dense hardwoods.
Pipe clamps have longer reach and theoretically better leverage. But that leverage cuts both ways. A tight grip on a 36-inch pipe clamp requires substantial force. Most woodworkers don’t apply enough. They’re also heavier and slower to position than bar clamps. I own eight pipe clamps and use bar clamps more often because they’re faster to set up.
Spring clamps and F-clamps are light-duty tools. Spring clamps typically max out around 100 pounds of clamping force — inadequate for most serious joinery. F-clamps vary wildly by quality. Cheap ones slip easily. Good ones (like Bessey models) hold pressure reliably. The trade-off: F-clamps are slower to tighten than bar clamps because you have to pump the handle multiple times.
Hand-screw clamps (wooden clamps with metal screws) are underrated. They distribute pressure across a wider jaw area and don’t slip. They’re slow to operate and can’t reach deep into an assembly, but where they fit, they work beautifully.
Lighter clamps generally underperform in terms of maximum achievable pressure. A flimsy bar clamp with thin steel might bend under full tightening. Heavier clamps with thicker bars deliver more consistent pressure without deflection.
Clamp pressure cannot rescue the wrong adhesive or a badly designed joint. Use our wood glue strength and selection guide to match glue chemistry, fit, exposure, and load.
Avoiding Over-Clamping Damage While Ensuring Good Pressure
The opposite problem is real: crushing wood fibers or warping panels. Too much pressure forces glue out completely, starving the joint from the opposite direction. Excessive pressure on a panel can bow it permanently or crush the grain, leaving visible depressions.
The fix is caul placement. Always clamp through protective cauls. A caul spreads the concentrated clamp pressure across a larger wood area, preventing fiber crushing. Use hardwood cauls — they resist deformation better than softwood. Oak works well. Pine cauls will compress and deliver uneven pressure.
Thickness matters — a thin caul flexes under clamp pressure. Use cauls at least 3/4 inch thick. For large assemblies, 1.5 inches is better. The stiffer the caul, the more evenly it distributes pressure.
You don’t need the clamps screaming-tight. The goal is consistent moderate pressure, not maximum possible force. Hand-tight, then a quarter-turn more with the clamp handle. That’s usually sufficient. The real secret is consistency — the same pressure at both ends of a joint, and the same pressure on both sides (if clamping from above and below).
Build a pressure-checking habit. Every time you clamp up, apply glue, and watch the squeeze-out carefully. Does it appear evenly along the joint? If not, loosen a clamp, check your caul alignment, and re-tighten. This takes 30 seconds and prevents joint failures. After a few assemblies, you’ll develop a feel for proper pressure and can diagnose under-clamping by the squeeze-out pattern alone.
“`



Stay in the loop
Get the latest the home woodshop updates delivered to your inbox.