“`html
What Causes Planer Snipe and Why It Happens
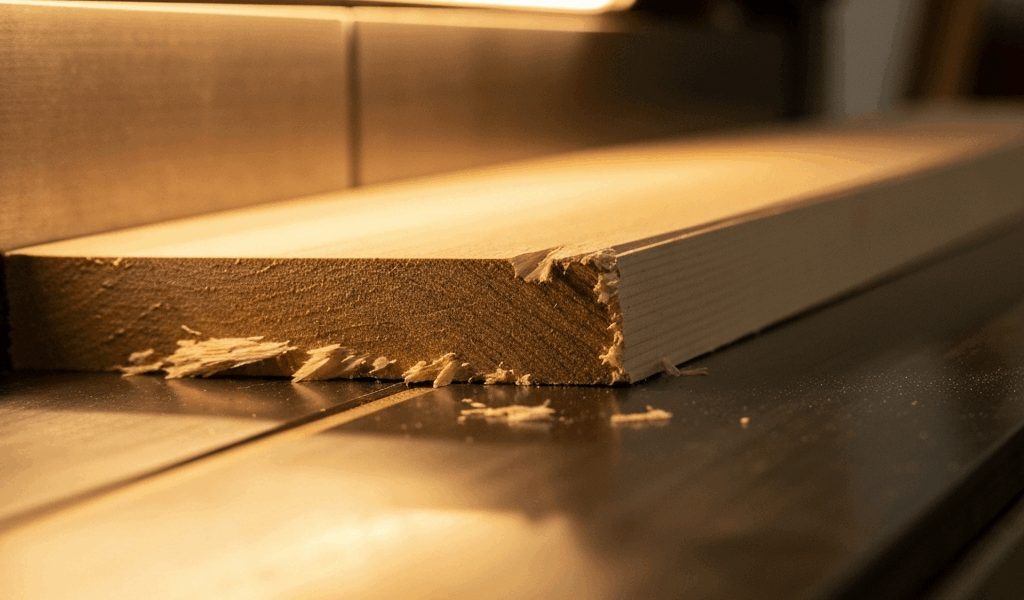
I’ve spent enough time staring at plane-marked lumber to understand planer snipe intimately — those frustrating gouges or deeper cuts that appear at the very beginning and end of each board. The board enters the infeed side perfectly flat, travels under the cutterhead, and exits the outfeed side, but somewhere in that transition, the machine takes an extra bite. Sometimes it’s shallow. Sometimes it’s enough to ruin a board you’ve spent an hour prepping.
The physics here is straightforward, but here’s where most people get confused. A planer’s infeed and outfeed tables support the workpiece as it moves through the cutterhead. At the exact moment a board’s leading edge leaves the infeed table, there’s zero support — gravity and machine pressure conspire to dip that end downward, dropping it deeper into the cutter. The same thing happens when the trailing edge leaves the cutterhead and hasn’t yet reached the outfeed support. The board flexes under pressure, particularly on narrow or thin stock, and the cutter catches deeper wood than the rest of the pass.
This isn’t a character flaw in your machine. It’s physics. Even $15,000 industrial planers experience snipe. The key difference? Understanding what makes it worse or better on your specific setup.
Check Your Infeed and Outfeed Table Alignment First
Before you change anything else, check whether your tables are actually level and coplanar with the cutterhead. Probably should have opened with this section, honestly — I skipped this step on my DeWalt 13-inch planer for two years before realizing my outfeed table had sagged about 0.008 inches. Two years of blaming the machine when I should have grabbed a straightedge.
You’ll need a straightedge (a 24-inch or 36-inch aluminum bar works perfectly) and a feeler gauge or caliper. Here’s the process:
- Unplug the planer and raise the cutterhead to its highest position so tables are fully exposed.
- Place the straightedge across the infeed table, running lengthwise down the center. Check for gaps between the straightedge and the table surface using a feeler gauge. You’re looking for differences under 0.002 to 0.005 inches. Anything beyond that is significant.
- Repeat on the outfeed table, then across both tables simultaneously — place the straightedge so it spans from infeed table, over the cutterhead opening, and across the outfeed table. This catches issues you’d miss checking them separately.
- The critical measurement: check whether the outfeed table is higher than the infeed table by roughly 0.010 to 0.015 inches. This is intentional — it supports the freshly planed board. But if it’s higher by 0.030 inches or more, the board will catch and snap upward, causing snipe.
- Mark any low spots with a marker so you know where adjustments are needed.
On most portable planers — DeWalt DW734, Makita 2012NB, Ryobi AP0500 — the outfeed table height adjusts using bolts or screws on the underside or sides of the table casting. A single turn of a 10mm bolt might shift height by 0.020 inches, so small, deliberate adjustments work best. Tighten one side slightly, recheck, and repeat. Patience beats speed here.
Too low? The board sags as it exits, and the cutter catches the tail end. Too high? The board rocks upward and the leading edge gets gouged deeper on entry. Both scenarios create snipe. I’ve adjusted these tables maybe a dozen times, and the difference between 0.010 inches too high and 0.010 inches too low is the difference between acceptable snipe and ruined stock.
This single check fixes snipe on roughly 60% of the machines I’ve encountered. It’s free. Takes 15 minutes.
Adjust Feed Rate and Board Support to Reduce Snipe
Once your tables are level, feed rate becomes your next control. Most portable planers default to around 25–30 feet per minute (fpm). That’s fast. Way too fast for a board that’s starting to dip without proper support.
Slowing the feed rate gives the infeed roller more time to grip and press the board down before it reaches the cutterhead. On machines with variable or dual-speed capability, drop from the high setting (around 30 fpm) to the low setting (typically 18–24 fpm). On fixed-speed machines, you’ve got one option: manual control — feed the board slower by hand. This sounds obvious, but most users ram stock through at max speed and wonder why snipe appears.
Equally important — maybe more important — is where you place your hands. Pressure on the outfeed side matters far more than infeed pressure. When the leading edge enters the cutterhead, apply firm downward pressure on the outfeed table — not behind the board, but on the table itself, near the exit. This prevents the board from dipping as it leaves the infeed support. Shift that pressure to follow the board through the pass, then release as the trailing edge clears. Hand technique alone reduces snipe noticeably on narrow boards.
For boards under 6 inches wide or under 0.5 inches thick, infeed and outfeed support extensions become your friend. A simple DIY solution is clamping a piece of scrap wood (same thickness as your workpiece) behind the board on entry and ahead of it on exit. The outfeed extension board prevents the trailing edge from dipping. I’ve used a 12-inch length of 2×4 clamped to my outfeed table with a hand clamp for years — costs about $2 per use and I’ve gotten hundreds of uses out of that routine.
Some users add aftermarket roller stands instead. These support the board at infeed and outfeed without costing more than $60–100. A Powertec or Woodstock roller stand positioned about 12 inches from the planer opening makes a measurable difference on longer boards. The roller spins freely, reducing friction while supporting height — no hand pressure needed.
When Snipe Is Normal and When It’s a Real Problem
Here’s the reality nobody mentions: light snipe is nearly impossible to eliminate completely. A shallow mark at one or both ends — under 1/32 inch deep — is often just the cost of using a portable planer. Professional shops accept this and plan for it. They surface boards oversized, accept the snipe, and cut around it afterward.
If you’re seeing snipe deeper than 1/32 inch, or if snipe appears in the middle of the board rather than the ends, you’ve got a real problem on your hands. Deep snipe usually signals table misalignment, a dull cutterhead, or excessive feed rate. Snipe in the middle can indicate a sagging table, worn rollers, or pressure imbalance in the infeed system.
Short boards are inherently difficult — that’s just reality. Under 12 inches? There’s barely enough wood for the infeed and outfeed tables to grip simultaneously. Light snipe on a 10-inch board is normal. Heavy snipe on a 36-inch board is not.
Dull cutterheads also amplify snipe considerably. A dull head requires more pressure to cut, which increases the deflection and exaggerates dips at the ends. If you’re getting deeper snipe than you used to, sharpening or replacing the cutterhead often solves it. I replaced mine after maybe 200 board-feet of planing — the difference was immediate.
Quick Fixes That Actually Work
If you want to reduce snipe without adjusting machines or buying new gear, try these ranked by simplicity and effectiveness.
Scrap cauls. Glue or tape a thin piece of scrap wood to the leading and trailing edges of your board (flat side down, glued to the underside). The cauls enter and exit the planer first, protecting your actual workpiece from the initial and final bite. Remove them afterward and sand lightly. Cost: $0. Effective on boards 0.5 inches thick or less.
Outfeed support board. Cut a piece of plywood or MDF to match your planer width and thickness (roughly 12–18 inches long). Clamp it to the outfeed table so the trailing edge of your workpiece has support beyond the planer opening. This is the single most effective DIY fix I’ve tried. Cost: $3–8. Effective on all board sizes.
Slower hand feed. On fixed-speed machines, resist the urge to push. Feed at half your normal speed. It feels awkward the first time, but snipe shrinks noticeably. Cost: $0. Effective but requires discipline — don’t make my mistake of rushing through.
Partial thickness planing. Instead of planing from, say, 1.25 inches to 0.75 inches in one pass, do 1.25 to 1.0 inches first, then 1.0 to 0.75 inches. Multiple lighter passes with less deflection mean less snipe per pass. Cost: $0. Effective but time-consuming.
Aftermarket rollers. A pair of infeed and outfeed rollers ($80–150) supports longer boards and reduces hand pressure requirements. If you plane regularly, this is worth it. Cost: $80–150. Effective across all stock types.
Start with table alignment, then layer in feed rate control and outfeed support. Most snipe problems vanish once these three variables are dialed in. Don’t waste time buying new machines or blaming yourself — it’s almost always one of those three.
“`


Stay in the loop
Get the latest the home woodshop updates delivered to your inbox.