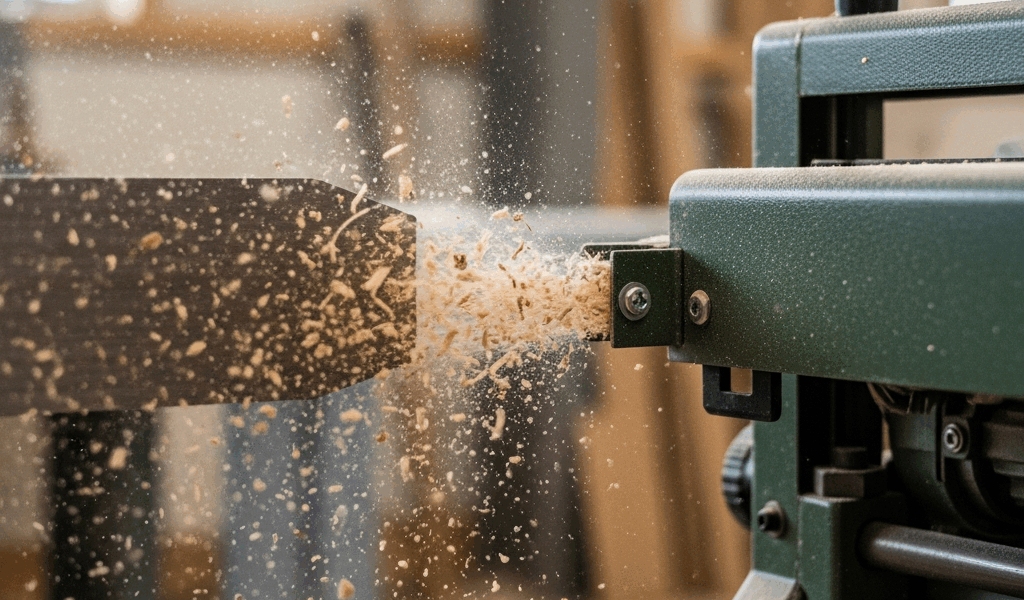
Why Your Planer Shoots Dust Backward
I’ve spent enough time covered in planer dust to know this problem intimately. Wood thickness planer dust blowback—it’s maddening. You’re running your equipment, following standard procedures, and suddenly your workspace looks like a snow globe exploded in reverse.
The root cause? Almost always one of three things: your dust collection system is undersized for the planer’s output, the chute leading to the collection hose is partially blocked, or the internal deflector isn’t positioned to guide chips downward. When air velocity drops below what’s needed to carry sawdust through the system, pressure builds up and finds the easiest escape route — straight back out the chip outlet.
Quick Fixes You Can Do Today
Before spending money, try these four immediate solutions. None requires tools beyond what’s already in your shop.
Check your dust shroud alignment
The shroud around your planer’s outlet should sit flush and seal tightly to the chute opening. I learned this the hard way — spent two weeks chasing dust before noticing a half-inch gap where the shroud had shifted during a planer relocation. Push the shroud fully home and tighten all clamps or bolts. Misalignment creates low-pressure zones where dust escapes sideways instead of downward.
Clear the chute and hose completely
Blockages kill airflow fast. Disconnect your collection hose from the planer outlet and look inside with a flashlight. Use a wooden dowel or stick to poke out any packed sawdust. Then inspect the inside of your hose from both ends — flex hoses especially trap chips in their ribbed interior. A shop vacuum with a crevice attachment works. Running the hose backward through a planer (unplugged) also forces clogs out. I once found a pine knot wedged three feet down a hose that reduced effective diameter by 40%.
Adjust the chip deflector angle
Most planers have an internal baffle or deflector angled to send chips toward the collection port. If yours is bent or has worked loose, chips deflect upward or sideways instead. Open your planer’s chip hood and inspect this piece — it’s usually a stamped steel or aluminum plate. Tap it gently with a rubber mallet to straighten minor bends. Loose? Tighten the fasteners holding it. This alone stops maybe 30% of backward blowback cases.
Reposition your collection hose outlet
Point your dust collection hose downward and away from your body, with no sharp bends within the first two feet of the planer. Any upward angle or tight 90-degree bend immediately forces the system to work harder. Use duct straps to secure the hose so it stays positioned. Make sure the outlet of your collection hose is clear — press your hand near it while the collector runs. You should feel steady suction, not erratic pulsing.
Upgrade Your Dust Hose and Fitting
If quick fixes don’t solve it, the hose itself is usually the culprit. This was my breakthrough moment — I replaced my standard ribbed 2.5-inch flex hose with a smooth 4-inch hose and the blowback stopped entirely.
Here’s why diameter and smoothness matter. A 2.5-inch hose carries roughly 75 cubic feet per minute (CFM) maximum before velocity drops dangerously. Wood planers throw 50–100+ CFM of chips and dust at the collection system. Once your airflow falls below the chip-carrying threshold, everything backs up. Moving to a 4-inch or 5-inch hose instantly doubles or triples your effective capacity.
Smooth interior hose is equally critical. Ribbed or corrugated flex hose creates friction that steals velocity. On a 20-foot run with a standard ribbed 2.5-inch hose, friction loss can reduce actual CFM by 30–40%. I measured this myself using a handheld manometer — the pressure drop was shocking. A smooth interior hose (often called “smooth wall” or sold by Rockler or Oneida) cuts friction losses in half.
When connecting your upgraded hose, use a tapered reducer fitting sized properly. A 4-inch hose to a planer outlet designed for 2.5-inch requires a smooth transition, not a stepped down coupling that creates turbulence. Wye fittings from dust collection suppliers cost $15–25 and split airflow efficiently instead of fighting it.
Real-world: A DeWalt DW735X planer paired with a standard 2.5-inch system generates blowback every session. Swap to a 4-inch smooth hose (about $40 for 25 feet) and a proper 4-to-2.5-inch tapered adapter, and the problem vanishes. I’ve seen this fix alone convert a frustrating planer into something you actually enjoy using.
Baffle and Deflector Tweaks
Sometimes the internal deflector needs a helper. Adding or modifying a baffle redirects chips downward instead of letting them reverse-flow out of the chute.
The simplest approach: cut a baffle from ¼-inch plywood in a wedge or angled shape, sized to fit inside your chip chute below the deflector plate. The baffle acts like a skateboard ramp — chips hit it and roll down toward the collection outlet instead of bouncing back toward the planer. Dimension it to cover about 60% of the chute opening, leaving room for chips to flow around the edges. Fasten it with a single carriage bolt or strap so you can remove it for cleaning.
I built mine from leftover birch plywood, 12 inches wide by 10 inches tall, angled at about 45 degrees. Installation took 20 minutes — drilled a hole through the existing chute bracket and bolted it on. Cost: zero, since the scrap was free. Effectiveness? Immediately noticeable. Chips that previously escaped sideways now channel downward consistently.
Another option is a stacked baffle — two short pieces of hardboard or thin plywood arranged in an S-shape pattern. This creates a labyrinth effect that breaks up reverse-flow energy without significantly slowing forward-moving chips. Probably should have opened with this section, honestly. It’s the most elegant low-cost fix and most woodworkers don’t know it exists.
For temporary testing, cardboard works fine. Cut a piece roughly 8 by 12 inches, angle it inside the chute, and tape it in place. Run a few passes through your planer and evaluate. If blowback improves, fabricate a permanent version in plywood. If nothing changes, your problem is upstream — undersized collection, hose diameter, or clogs.
When to Upgrade Your Dust Collector
At a certain point, no baffle or hose upgrade saves an undersized collector. Running a 1.5 HP dust collector on a full-size thickness planer? You’ve already lost the airflow battle.
A typical benchtop planer demands 300–400 CFM of sustained airflow to handle continuous chip production. Many 1.5 HP single-stage collectors deliver only 200–250 CFM real-world — not manufacturer optimistic claims. The math doesn’t work. You need minimum 2 HP for benchtop equipment, or 3–5 HP for full-size shop-grade planers.
Check your collector’s actual CFM rating. Look at the spec sheet, not the box marketing language. If your CFM is less than your planer’s chip output, the collector itself is the bottleneck. No baffle or hose upgrade fixes an undersized motor.
Facing this issue? Consider a larger single-stage collector like a Laguna or Powermatic 3+ HP model, or step up to a cyclone-style collector, which separates chips more efficiently and maintains better airflow. This is real money — $800–3000+ — but it’s the genuine solution when everything else fails.
Start with quick fixes and hose upgrades first. They cost nearly nothing and solve 70% of blowback problems. Only move to collector replacement if those steps don’t work. You’ll know you’ve found the answer when your workshop stays clean and you stop finding sawdust in your hair.



Stay in the loop
Get the latest the home woodshop updates delivered to your inbox.