How a Drill Press Depth Stop Actually Works
Drill press depth stops have become tricky with all the misinformation flying around. So before we start diagnosing why yours isn’t working, let’s talk about what you’re actually looking at — because the system itself is almost embarrassingly simple.
A vertical rod — called the stop rod — threads into a collar that wraps around the quill. Turn the collar, it moves up or down the rod. Pull the handle, the quill drops. When the quill hits the collar, it stops. That’s genuinely the whole thing. Stop rod, locking collar, depth scale, quill. Four parts. One fails, the whole system breaks down.
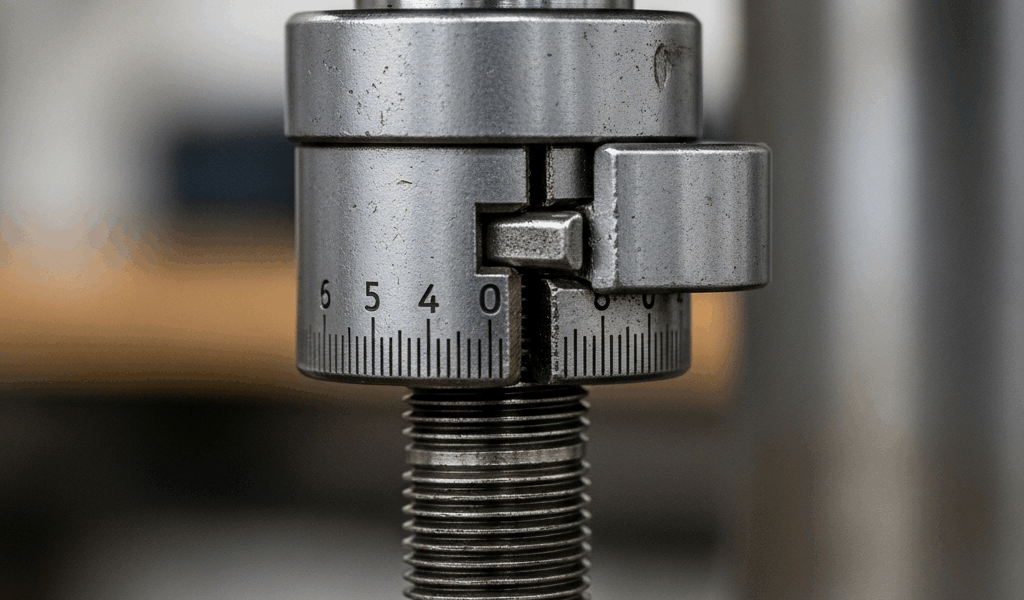
The depth scale is printed or engraved along the side of the machine. You read it against a pointer fixed to the quill housing. Some newer machines have gone digital, but the underlying principle hasn’t changed since the 1950s. And the weakest point — almost every single time — is where the collar meets the rod. Friction, wear, user error. Usually some combination of all three.
Loose or Slipping Depth Stop Collar — The Most Common Culprit
I’ve owned three drill presses. Two of them had this exact problem. The collar loosens, depth changes between holes, you tighten it back down, and three weeks later it’s loose again. Annoying doesn’t even come close.
Here’s how you diagnose it. Set your depth to 1/2 inch. Run the quill down until it contacts the stop. Take a permanent marker and mark where the collar sits on the rod. Raise the quill all the way up. Tighten the collar like you normally would. Pull the handle down again. If that marker line has shifted — even 1/16 inch — the collar is slipping. Simple as that.
The fix depends on your specific machine. Most collars use either a set screw on the side or a lock nut underneath. If yours has a set screw, loosen it slightly and feel the screw head. Is it sitting flush against the rod, or is it bottoming out in a stripped hole? A stripped set screw hole needs a slightly larger screw or a helicoil insert. Hardware stores don’t carry helicoils — but they take about five minutes to install if you’re patient and following the instructions.
Lock nut collar? Tighten it hand-tight first, then give it exactly 1/4 turn with a wrench. Don’t go further. These nuts strip out the same way set screws do — faster, actually.
Here’s something most guides completely skip over. Budget drill presses — especially anything under $200 — sometimes use plastic collars. I found this out years ago when I lent my Wen 4214 to a neighbor. He cranked the collar down hard and cracked it clean through. Check yours for hairline fractures along the edges. If it’s cracked, replace it through the manufacturer, not some Amazon third-party listing. The cheap replacements fail again in about six weeks. I’ve seen it happen twice.
Stop Rod Is Bent or Threads Are Damaged — The Second Wave Problem
Frustrated by a slipping collar, most people tighten harder. Then a bit catches in the wood. The quill jerks downward. Now the stop rod is bent or the threads are mangled — and you’ve turned a $15 fix into a $60 one.
Start with a visual inspection. Spin the collar slowly along the entire length of the stop rod. Does it turn smoothly, or does it catch and bind at certain spots? Binding means the rod is bent. On a 12-inch drill press, a replacement rod runs $45–$80 depending on the brand. A Jet JDP-12 rod is about $62 last I checked. A generic rod from the hardware store is $8 — and it won’t thread properly. You’ll waste two hours and end up ordering the real one anyway. That was 2019, and I still think about it.
Damaged threads feel different from a bent rod. Spin the collar by hand. Does it move freely, or is there a grinding sensation every few rotations? Grinding suggests stripped or galled threads. Light galling you can sometimes clean up with a brass wire brush attachment on a drill — spin the rod slowly while brushing, keep even pressure. Deep damage means replacement. No way around it.
One thing worth trying before you do anything else: dab a small amount of white lithium grease on the rod threads and work the collar up and down about thirty times. This clears light aluminum oxidation that can mimic actual thread damage. Worth mentioning before anything else — it costs nothing and fixes roughly 20% of thread-related complaints.
Depth Scale Is Misread or Out of Calibration
So the collar isn’t slipping. The rod looks straight. And yet the depth still doesn’t match what the scale is telling you.
First — verify you’re reading the scale correctly. The pointer should align with the scale marking cleanly. On some machines it’s mounted on the quill housing itself. On others, there’s a separate indicator arm. Look at yours specifically. Where exactly does it contact the scale?
Now grab a ruler and verify. Set the depth collar to what you believe is 1/2 inch. Lower the quill to the stop. Place a ruler on the drill table and measure from the table surface to the tip of an unsharpened pencil held in the chuck. Does that measurement match your scale? If the ruler says 9/16 inch and your scale says 1/2 inch, you’re off by 1/16 inch. For precision joinery, that matters. For rough work, probably not — but you should at least know the offset exists.
Some machines let you reset the pointer. Look for one or two screws holding the pointer assembly in place. Loosen them, rotate the pointer to align with your actual measured depth, retighten. Older Delta units do this. Most Powermatic machines do too. Cheaper Wen and Shop Fox models sometimes don’t — the pointer is welded or glued from the factory.
If your scale is fixed and inaccurate, you’ve got two paths forward. Ignore the scale entirely and use a ruler every time. Or memorize the offset and subtract mentally — if it reads 1/16 inch high consistently, always subtract that from your target. Not elegant, but it works.
When the Return Spring Is the Real Problem
You’ve gone through the collar, the rod, the scale. Everything checks out. But depth still drifts hole to hole. That points to a weak quill return spring — and it’s sneakier than it sounds.
Here’s how it causes problems. The quill has a return spring that pulls it back up when you release the handle. A weak or broken spring means the quill doesn’t fully retract between holes. Each time you lower it, the starting position is slightly different. So the stop engages at a different depth each time. The scale isn’t lying to you — the quill just isn’t returning to the same home position consistently.
Test it. Pull the quill handle all the way down, then let go completely. Does it snap back immediately? Or does it drift down slowly? A healthy spring returns in under a second — fast and decisive. A weak spring takes three to five seconds. A broken one doesn’t return at all.
Replacing the spring is genuinely a shop-level task on most machines. The spring sits under tension inside the quill housing, which means partial disassembly before you even see it. If you’re mechanically confident, contact the manufacturer directly for a spring kit and watch their service video before touching anything. If not, a local machine shop can swap the spring for $40–$80 in labor plus the part itself. Worth every dollar if the rest of your machine is solid.
The Diagnostic Order
Collar first. Rod second. Scale third. Spring last. Work through them in exactly that sequence — the collar is cheapest to fix and requires zero disassembly, while the spring sits behind the most teardown work. Skip past the mistake I made of jumping straight to the complicated stuff before ruling out the obvious. Go one by one, and you will find the problem.


Stay in the loop
Get the latest the home woodshop updates delivered to your inbox.