How to Tell If Your Band Saw Blade Is Actually Tracking Wrong
I spent three months convinced my band saw had a blade tracking problem. Turned out I was just cutting walnut at a weird angle — but that experience taught me everything about spotting real tracking failure versus normal drift.
When a blade actually tracks wrong, it shows itself pretty clearly. The blade creeps toward one side of the wheel. You’re pushing straight but your cuts veer left or right anyway. One edge of the kerf burns dark, the other stays clean. You adjust, test cut, adjust again — and the blade’s still wandering into the workpiece like it has a mind of its own.
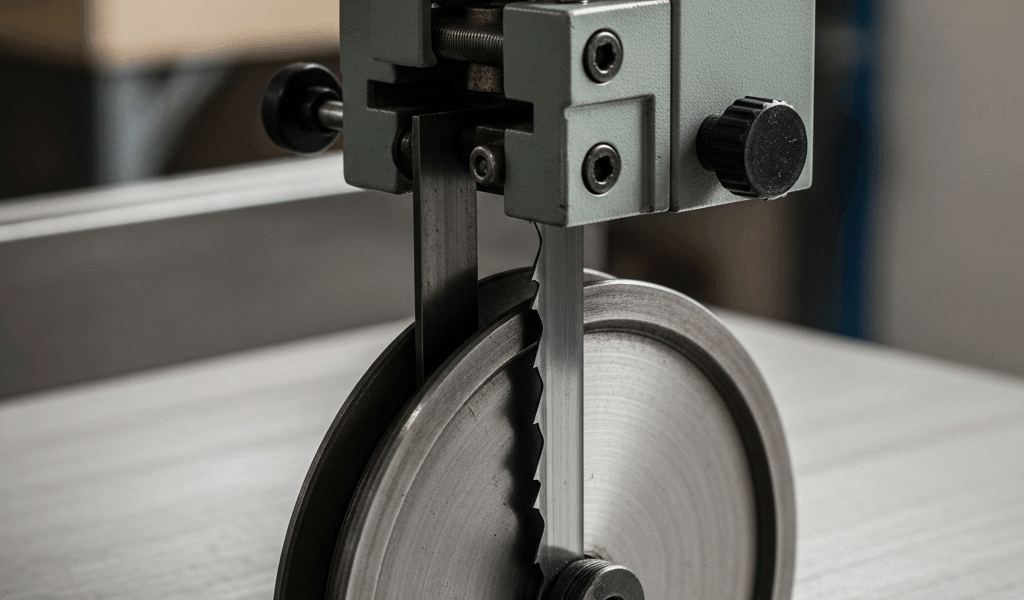
Here’s what matters: loosen your blade tension to almost nothing, then spin the wheel by hand. Watch where the blade sits on the wheel rim. A blade tracking correctly? It stays centered. A blade that’s drifting? It’ll ride toward one edge of the tire — you’ll actually see it creeping across the rubber as the wheel rotates.
Minor drift happens. Maybe 1/8 inch of movement across the wheel diameter. That’s normal, especially on older machines. When a blade tracks so far that it’s running on the tire edge or threatening to fall off entirely — that’s your signal something needs adjustment.
The visual test matters because it separates real tracking problems from everything else. A blade that burns only on one side might be tracking. Might also be dull, set wrong, or being fed at an angle. But if the blade is literally riding off-center on the wheel? That’s tracking, and it’s fixable.
Check Wheel Alignment First — Most People Skip This
Probably should have opened with this section, honestly. I spent weeks tweaking tension before I realized both my wheels were tilted.
The upper wheel angle controls where your blade sits on the tire. Most band saws have an adjustment bolt or screw on the back of the upper wheel housing. Loosen it just enough to let the wheel tilt slightly — don’t go loose or the wheel starts wobbling during cuts. I learned that the hard way when I completely loosened mine once.
The penny test works every time: place a penny against the blade while the saw is off and the blade is under normal running tension. Spin the wheel by hand. If the penny stays flush against the blade without catching or dropping away, your wheel is square to the blade. If it catches on one side, the wheel is tilted. Thirty seconds, and you’ve got your answer.
Now adjust. Tighten the wheel alignment screw in small increments — quarter-turn at a time. Spin the wheel after each adjustment. The blade should sit centered and stable. It won’t be perfect. These are mechanical machines, not Swiss watches. What you want is the blade sitting evenly across the tire width without obvious bias to one edge.
Why does wheel angle matter more than people think? An angled wheel creates mechanical force that pushes the blade toward the lower edge of the tire. No amount of tension adjustment fixes this. You’re fighting the geometry itself.
Common mistakes I’ve made or seen: overtightening the alignment screw, which locks the wheel at an angle and defeats the whole purpose. Going straight to tension adjustment without checking alignment first. My personal favorite — adjusting the wheel, forgetting to re-tension the blade, then blaming the entire setup for not working.
Check both wheels if your saw has an adjustable lower wheel. Not all do. Older saws and some budget models only adjust the upper wheel. But if yours adjusts, apply the same penny test and alignment logic to the lower wheel. The wheels need to be parallel to each other and the blade needs to run centered on both.
Tension and Tracking Are Not the Same Thing
This confusion costs people money. They over-tension a badly tracked blade hoping tension will fix drift. What actually happens: the blade stays off-center, burns hotter under load, and bearing wear accelerates fast.
Tension holds the blade tight enough that it doesn’t slip on the wheels during cutting. That’s literally it. Tension does not center the blade. Tension does not correct wheel angle. Tension just keeps the blade from losing grip.
Proper tension feels like this: the 1/4 deflection rule. When the saw is off and the blade is running at full tension, press the blade sideways at the midpoint between wheels. It should move about 1/4 inch before hitting hard resistance. That’s right. Too loose and the blade slips and wanders during cuts. Too tight and the bearings carry extra load they weren’t designed for.
I checked tension wrong for months. I’d crank the tension knob until the blade felt rock solid, thinking that meant it was right. Twenty minutes of cutting later I’d smell burning bearings and wonder what happened. Turned out I was running at double the proper tension.
Tension and tracking interact, but they’re separate problems. A properly tracked blade that’s under-tensioned will drift during aggressive cuts. A badly tracked blade will drift regardless of tension. The interaction is real but they need different fixes.
The sequence matters. Fix tracking first, then set tension to spec. If you reverse it, you’re guessing. You’ll tighten the blade hoping to hold a drift, the blade will heat up, the wheels will wear faster, and you’ll be replacing tires at $60–$85 each. I know because I’ve bought four sets now.
Bearing Wear and Tire Degradation — The Hidden Culprits
Some band saw tracking problems aren’t problems at all. They’re symptoms of parts that are simply worn out.
The guide bearings live above and below your workpiece. They support the blade and keep it from bending sideways. When these bearings wear, they develop play. The blade has more freedom to move, so it drifts during cuts even if everything else is adjusted correctly. This is the persistent drift that adjustments won’t fix.
How to check: with the blade under tension and the saw off, grab the blade at the cutting point and try to move it sideways. It should barely move. If you can deflect it 1/4 inch or more, the guides are shot. Worn guides on a new blade will still cause tracking problems.
The lower wheel tire degrades faster than people expect. Band saw tires are rubber. They harden, glaze, and flat-spot over time. A tire that’s glazed won’t grip the blade properly — the blade will slip and drift. A tire that’s flat-spotted makes the wheel wobble, which throws tracking off with every rotation.
Visual tire check: look at the lower wheel while the saw is running. If the tire surface looks shiny and smooth like polished vinyl, it’s glazed. If you see a flat spot where the wheel contacts the table, that’s a tire problem. The glazed tires on my old saw cost me nearly two months of project time because I kept chasing tracking adjustments that were never going to work.
Tire replacement runs $50–$120 depending on wheel size. Guide bearing replacement or complete bearing block replacement runs $30–$150 for parts plus your labor. At some point, troubleshooting more becomes less cost-effective than just replacing the worn component. If you’ve already adjusted wheel angle twice and the blade still drifts in the exact same pattern, check the bearings and tires before you spend more time on adjustments.
The Adjustment Sequence That Works Every Time
Here’s the order that actually works, taken from three years of real shop diagnostics.
Step 1: Upper wheel alignment. Loosen the upper wheel adjustment bolt. Use the penny test to dial the wheel square to the blade. Tighten the bolt when the blade runs centered. Spin the wheel at least five full rotations to confirm it stays centered.
Step 2: Lower wheel alignment. If your saw has an adjustable lower wheel, do the same process. If not, skip this — not all machines have lower wheel adjustment, and that’s okay. The upper wheel controls most tracking.
Step 3: Tension. Set the blade tension using the 1/4 deflection rule. Don’t guess. Use the actual measurement. Press at the blade midpoint, feel for that quarter-inch movement, stop there.
Step 4: Test cut. Make a test cut on scrap wood in the same thickness and grain direction as your actual project. Look for drift. If the blade pulls left, the issue is still present.
Step 5: Micro-adjust upper wheel. If drift persists, make a very small adjustment to the upper wheel angle — 1/8 turn on the adjustment bolt. The direction depends on which way the blade drifts. If it pulls left, tilt the wheel to push it right. Test again.
If you’ve already tried adjustments and the blade still drifts in the same direction: inspect guide bearings and the tire. Worn parts won’t respond to adjustment.
If the blade drifts inconsistently — one cut pulls left, the next pulls right — check wheel runout. Spin the wheel by hand and watch the tire. If it wobbles in and out, the wheel itself is warped. This is rare but it happens, especially on older saws or machines that took a knock.
The whole sequence takes maybe fifteen minutes once you know what you’re looking for. Most people can solve their tracking problem in that time frame. The rest have worn parts that need replacing, which is fine to know. At least you’re not chasing ghost problems.



Stay in the loop
Get the latest the home woodshop updates delivered to your inbox.