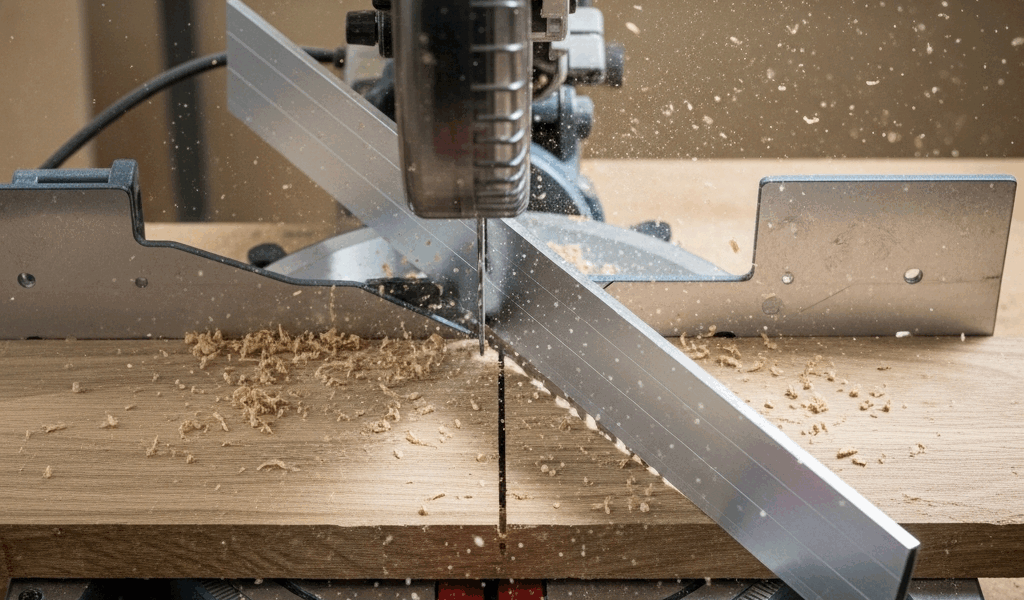
Why Your Chop Saw Fence Drifts During the Actual Cut
I’ve spent enough time at a chop saw to know exactly when something feels wrong. You line up your cut. You press down. The blade spins. And somewhere mid-cut—usually around the moment the teeth hit the meat of the material—that fence shifts backward a quarter inch, sometimes half an inch. Your cut lands nowhere near where you marked it.
Most people blame loose bolts immediately. That’s only half the story.
What’s actually happening is a lateral force problem. When your blade bites into wood, especially hardwood, it doesn’t just push down and back. It pushes sideways. The teeth on a crosscut blade are angled to cut across the grain, and as they engage, they generate force that wants to shove the entire fence assembly rearward—and sometimes slightly laterally depending on your blade angle and what you’re cutting through.
Frustrated by inconsistent cuts on a 2×10 oak board, I ran the same piece through three times without touching the fence. Three different kerf positions. That taught me to think about the physics instead of assuming hardware failure.
Here’s the key: the harder you push down, and the denser the material, the stronger that lateral force becomes. Ripping through pine? The softer wood compresses slightly and absorbs some lateral energy. Oak, maple, or cherry? Those dense woods bite hard and fight back. The blade doesn’t move. The fence does—unless it’s clamped aggressively enough to resist that shear.
The clamp pressure you apply by hand is often insufficient. A typical chop saw fence handle clamp—the lever or knob you tighten—delivers maybe 300 to 500 pounds of holding force if you’re really muscling it. But a dense hardwood crosscut can generate 800 to 1200 pounds of lateral resistance when you’re cutting through a 12-inch-wide board.
That’s the mismatch. Your clamping force is weaker than the cutting force. The fence slides.
Aluminum fences amplify this because aluminum is softer than steel. When you clamp an aluminum fence face, you’re not gripping steel-to-steel friction. You’re relying on the bolts to prevent movement, and if those bolts have even slight play or the threads have worn, you get slippage immediately.
Check These Three Things First Before You Buy Anything
Before you order a replacement fence or assume your saw is shot, run through these diagnostics. You’ll probably find the culprit yourself.
Step One—Inspect the Fence Face and Rails for Damage
Remove the fence from the saw if possible. Lay it flat on your workbench. Use a straightedge—a 24-inch aluminum level works fine—and run it along the fence face both horizontally and vertically. Any gap between the straightedge and the fence indicates warping. Even a 1/16-inch gap is enough to cause slippage during a cut because the clamp won’t make full contact.
While you’ve got the fence out, look at the mounting rails—the horizontal bars the fence slides on. I found a fine layer of sawdust and resin buildup on mine that I’d never noticed before. That debris acts like a low-friction surface. Run a dry cloth or stiff brush along both rails. Then wipe with a slightly damp cloth and let it dry completely. Debris is probably responsible for 20 percent of fence drift that people blame on loose hardware.
Check the fence face itself for dents or gouges. Rounded depressions where the clamp head contacts the fence are a problem. The clamp won’t seat properly, and pressure won’t be uniform.
Step Two—Test Your Clamping Pressure
Reinstall the fence and tighten the clamp by hand only—no wrench. Tighten it snugly. Now grab the fence body and try to move it backward toward the blade. It should not budge. At all. If it shifts more than a sixteenth of an inch under moderate hand pressure, your clamp is not holding correctly.
Next, use a wrench on the clamp bolt. Tighten it another quarter turn, then test again. Repeat this process until the fence is absolutely rigid. Many people stop tightening well before the clamp is tight enough because they’re afraid of stripping threads or breaking something. You won’t damage a proper fence clamp by tightening it until the fence is locked solid.
Step Three—Look for Stripped Threads and Bent Rails
Remove the clamp completely and inspect the bolt threads. If they’re damaged, shiny in random spots, or if the bolt spins without resistance, the threads are stripped. That bolt needs replacement. Any hardware store carries standard bolts—measure yours, note the diameter and thread pitch, and grab a new one in stainless steel if available (holds up better).
Look at the mounting rails where they attach to the saw body. If any bolts are missing or loose, tighten them with an appropriate wrench. I once found that two of the four mounting bolts on a DeWalt were finger-loose—probably from vibration over time. Tightening those bolts alone fixed 90 percent of my fence drift.
Tighten It Right and It Stops Shifting
Probably should have opened with this section, honestly. Most fence drift is fixable with correct tightening technique.
First—and this is critical—tighten the fence clamp in a specific sequence. If your clamp has multiple contact points (top and bottom, or left and right), tighten the bolts evenly. Don’t fully tighten one side, then move to the other. Go quarter-turn, quarter-turn, alternating sides until everything is snug. This prevents uneven pressure that can cause warping on aluminum fences.
For a standard chop saw, you’re aiming for clamp pressure that makes the fence absolutely immobile. On DeWalt DW715 and similar models, the clamp handle should require moderate force to move—if it moves easily, you haven’t tightened enough. For Makita models like the LS1040, the screw clamp should be snug enough that you can’t turn it another full rotation without significant force.
Aluminum fences require less pressure than steel, but not because aluminum is weaker—because contact pressure is the limiting factor. Aluminum is softer, so hard contact points dig in. You achieve clamping force with less pressure, but you need better surface contact. Make sure the clamp face is clean and flat against the fence surface. A grain of sand under that clamp can create a pressure point that lifts the fence somewhere else.
Steel fences need more pressure because steel doesn’t deform. You’re relying purely on friction, so clamp harder. Most steel-fence chop saws—like older Hitachi models—benefit from an actual torque wrench set to 15-20 foot-pounds on the main clamp bolt. That sounds high, but it’s not. You won’t break anything.
If you don’t own a torque wrench, buy one. A basic 3/8-inch drive wrench runs $20-40 and eliminates the guesswork. Over-tightening becomes impossible. Under-tightening becomes obvious.
If Your Fence Rail Is Actually Bent or Warped
Run your straightedge test again now that you’ve cleaned and tightened everything. If there’s still a gap larger than 1/32 inch, your fence rail is probably warped or bent.
A replacement fence assembly varies by brand. A DeWalt DW715 fence costs roughly $60-90 online. A Makita LS1040 fence runs $70-110. These are not cheap fixes, but they’re also not prohibitively expensive.
Before you buy, consider a DIY fix. An aluminum angle stock—2-inch aluminum angle, available at any hardware store for $15-25 per 8-foot length—can be drilled and bolted to your existing fence rail as a straightening surface. I’ve done this on a damaged fence. You bolt the angle stock to the existing fence, position it so the new face is perfectly straight (using a level and shims), and tighten everything. Your clamp now grips a straight surface, and drift disappears.
This works because you’re not replacing the whole fence—you’re just adding a straight clamping surface on top of whatever warping exists underneath.
Stop It From Happening Again
Prevention is cheaper than diagnosis. Develop a maintenance habit.
Every 10-15 cuts during production work, stop and re-tighten your fence clamp. Seriously. Vibration loosens bolts gradually, and you’ll feel the difference before you see it in your cuts. A 30-second wrench check beats measuring and discovering an eighth-inch error on your 47th board.
Wipe the fence rail and face with a clean, dry cloth after every work session. Sawdust, especially fine dust from sanding or high-speed crosscutting, accumulates invisibly and affects clamping pressure.
If your shop has seasonal humidity swings—dry winters, humid summers—monitor your aluminum fence. Aluminum expands and contracts with temperature and moisture. A fence tight in January might be loose in July. Check tightness at the beginning of each season and adjust.
Finally, use a sharp blade. A dull blade generates more lateral force because it has to work harder to cut. The teeth dig instead of slice, increasing shear stress on the fence. A fresh blade—I’m apparently loyal to Freud Diablo 10-inch crosscut blades, around $30—cuts cleaner and produces less sideways pressure. That alone reduces fence creep significantly.




Stay in the loop
Get the latest the home woodshop updates delivered to your inbox.