“`html
Miter Saw Fence Creeping During Cuts — Here’s Why and How to Fix It
Last spring, I spent an entire Saturday afternoon watching my DeWalt DWS779 produce increasingly wonky crosscuts. The fence would shift maybe a quarter-inch mid-cut, throwing off my measurements just enough to ruin perfectly good 2x4s. I wasted hours on blade adjustments, fence angle tweaks, and test cuts that had nothing to do with the actual problem. When I finally diagnosed it, the fix took maybe ten minutes. Miter saw fence creeping has gotten complicated with all the bad advice flying around online—everyone jumps straight to blade quality or motor issues. That’s not your problem.
The fence shifts. You make a cut. Everything goes sideways. Let’s fix that.
Why Your Miter Saw Fence Creeps During Cuts
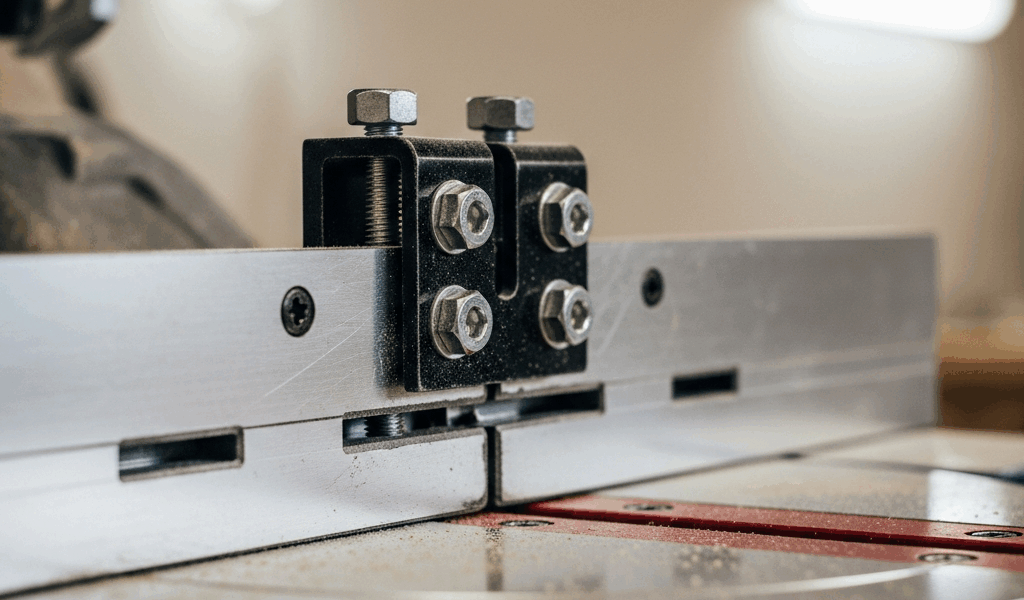
Before spending money on anything, understand what’s actually happening. Your fence assembly relies on three things to stay locked in place while the blade cuts through material: mounting bolts anchoring it to the base, clamping knobs or levers applying pressure, and clean contact surfaces where those clamps grip.
When any of those three fail, the fence shifts.
Loose mounting hardware comes first. Your fence bolts—usually ½-inch or 5/16-inch depending on the saw model—gradually work themselves loose through vibration. Not dramatically. Just enough that the fence rocks slightly when you clamp down for a cut. If you’ve never checked these bolts, they’re probably the issue.
Clamping knobs and levers wear out second. Plastic knobs, especially on mid-range saws, develop stripped threads or rounded contact surfaces after a year or two. They still turn. They still *feel* tight. But they don’t actually apply force anymore—you’re tightening a knob spinning in a dead zone, creating zero clamping pressure.
Debris is the third culprit, and it surprises people. Sawdust, wood chips, and oxidation build up where the clamp meets the fence face. That thin layer of gunk acts like a bearing, letting the fence slip under cutting pressure. The clamp is tight, but it’s tight *over* contamination instead of tight *against* the fence itself.
Here’s my diagnostic test: Mark a line across the fence body with a permanent marker, extending onto the base rail so you can see if the fence shifts. Make a cut on scrap material. Check if your mark lines still align. Measure the drift with a ruler if it’s visible. Even 1/16-inch of drift confirms the problem lives in your fence assembly, not your blade.
Check and Tighten Fence Mounting Hardware
Locate the mounting bolts first—they sit underneath or behind the fence where it connects to the base platform on most miter saws. You’ll need a wrench, typically 10mm, 12mm, or 13mm depending on your brand. Grab your owner’s manual or flip the saw upside-down if you need to see where they are.
Use the wrench to check each bolt. They should be tight enough that you need real force to move them. If they spin easily, or if you can see gaps between the bolt head and the mounting surface, you’ve found your problem.
Tighten systematically. Start with the bolts closest to the fence clamp, then work outward—this prevents uneven pressure that could warp the fence. On DeWalt saws, the fence mounting bolts typically sit at around 30-35 ft-lbs of torque. Makita specs usually call for similar tension. Bosch miter saws run slightly higher, around 40 ft-lbs. If you have a torque wrench—honestly, you should if you’re doing this work—use it.
Don’t have a torque wrench? Here’s what I do: Hand-tighten first until the bolt won’t spin. Then use the wrench to apply firm pressure. You want “snug and solid,” not “wrenching with your whole body weight.” Over-tightening strips threads or cracks plastic components around the bolt hole, which is worse than loose bolts.
Probably should have opened with this section, honestly. Ninety percent of fence creep issues stop right here.
Inspect and Clean the Fence Face and Clamps
Even if your bolts are tight, you still need to check the clamping surfaces. Run your fingers across the fence face where the clamp pads make contact. Feel for roughness, oxidation, or crusty buildup—that’s your problem.
Pull the clamp away from the fence. Look at both surfaces, the clamp face and the fence face. You’ll probably see a layer of dust and fine wood particles pressed into the metal. This acts exactly like a lubricant, reducing friction and letting the fence slide under cutting pressure.
Clean it. Wipe both surfaces with a dry cloth first. For stubborn buildup, use a soft brass brush or old toothbrush to scrub the contact area. Don’t use anything abrasive that could scratch the metal—you want to remove contamination, not texture the surfaces. Oxidation or rust? A pencil eraser actually works surprisingly well. I know that sounds ridiculous, but I’ve used a regular eraser on the fence faces of three different saws with good results.
Inspect for actual damage while you’re at it. Deep gouges or pitting on the clamping surface prevents full contact. In rare cases, you might need to file the surface smooth, but most of the time cleaning reveals metal underneath that’s perfectly fine.
Reassemble the clamp and tighten firmly. Make another test cut. Measure the drift again.
Replace Worn Fence Clamping Knobs or Levers
If bolts are tight and surfaces are clean but the fence still creeps, your clamping knobs have likely reached end-of-life.
The symptoms are specific: The knob spins easily and doesn’t require much force. When you fully tighten it, there’s no resistance—you’re not actually clamping anything, just spinning plastic in air. DeWalt DWS779 models commonly develop this issue around year two or three of regular use.
Identify the knob or lever assembly on your specific saw. Most have a bolt running through the center that you can remove with an appropriate wrench. Take a photo of the original knob before removal so you know how to orient the replacement. Remove that center bolt and slide the old knob off the post.
Two options: OEM replacement parts or upgraded aftermarket knobs. Genuine DeWalt, Makita, or Bosch knobs cost $12–$25 each and are guaranteed to fit. Aftermarket upgrade knobs from Woodstock International or Grizzly run $8–$18 and often have thicker contact pads or coarser grip surfaces that actually work better than originals.
I’ve used upgraded knobs on two saws with success. The heavier-duty aftermarket versions have wider grip surfaces and better material composition. They cost less and tend to outlast the original equipment parts.
Slide the new knob onto the bolt post. Make sure it’s oriented the same way the original was—this matters so your clamp face aligns properly. Reinstall the center bolt and tighten until the knob is snug, but don’t over-tighten and strip the new part immediately.
Now clamp the fence. The new knob should require noticeably more effort to tighten, and you should feel real resistance as you apply force. That’s how you know the clamping pressure has returned.
When to Call It—And Upgrade Your Setup
Some fence assemblies are fundamentally flawed by design. If you’ve tightened bolts, cleaned surfaces, and replaced knobs but the fence still drifts by more than 1/32-inch, your fence assembly might be warped or the mounting points might be worn beyond practical repair.
Replacement fence kits run $80–$180 depending on your saw model. That’s significantly cheaper than a new miter saw, and a new fence often restores the saw to near-original precision. DeWalt, Makita, and Woodstock offer replacement assemblies that bolt directly onto your existing base.
This is genuinely worth it. I replaced a fence assembly on a Bosch saw that had developed permanent creep despite all three fixes above. The new fence brought the saw back to factory specs, and I’ve had zero issues for over two years now.
Test-cut on scrap material and measure the drift one more time before deciding you need a replacement. Most drift problems solve with tightened bolts and cleaned clamping surfaces—the knobs are just the final safety net.
“`


Stay in the loop
Get the latest the home woodshop updates delivered to your inbox.