Why Scroll Saw Blades Keep Slipping Out
Scroll saw blade slipping has grown more complex with the conflicting advice flying around. As someone who’s popped blades loose mid-cut more times than I care to admit, I spent real time learning the ins and outs of clamp failures the hard way. Today, I will share it all with you.
There are exactly three reasons a blade keeps escaping its clamps — worn clamp faces that can’t grip anymore, a blade end style that doesn’t match your clamp design, or simply not enough tension. That’s it. Three culprits. Most people immediately crank the set screw harder. Instinct, I get it. But overtightening won’t fix worn hardware or a mismatched blade end. It just strips the screw or snaps the blade in half.
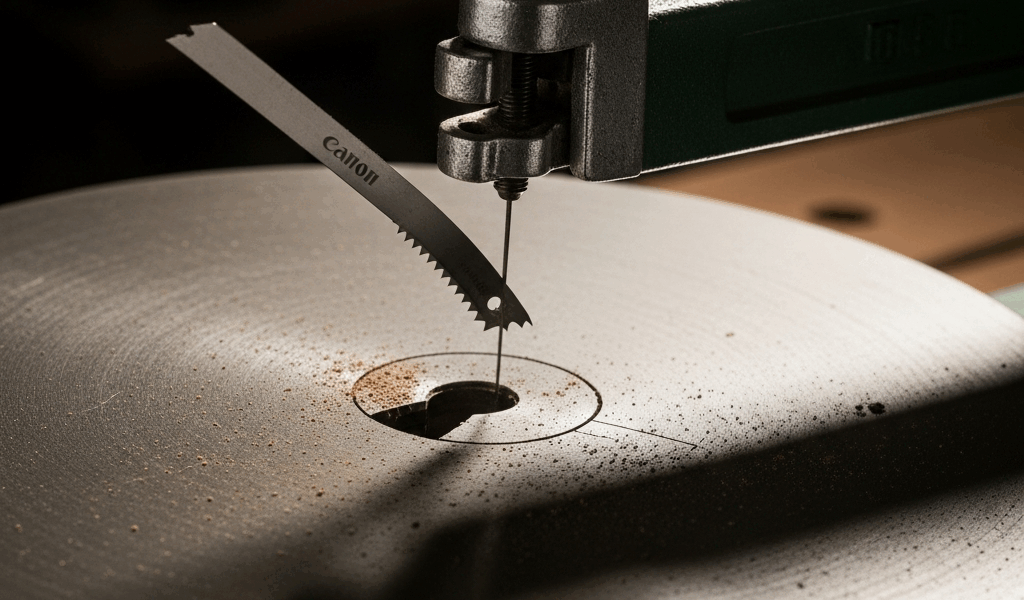
So, without further ado, let’s dive in. First step: figure out what clamp system you’re actually working with. Pin-end clamps use a small metal pin at each blade end. Plain-end clamps grip a flat blade section inside a slotted head. Tool-less clamps use lever arms instead of screws. Different machines, different failure modes, different fixes.
Fixing Blade Slip in Pin-End Clamp Systems
Pin-end systems show up on older machines and plenty of European imports. Each blade end has a metal pin that slots into a socket inside the clamp head. Sounds bulletproof. It isn’t.
Frustrated by a DeWalt DW788 that kept spitting out blades mid-cut, I went digging through every forum thread I could find — only to realize the saw itself was fine. The problem was the blades. Cheap pin-end blades are made with soft metal pins. After a season of regular use, that pin flattens slightly right where the socket grips it. The blade starts spinning in the clamp. You’ll feel it before you see it — a grinding sensation and cuts that veer sideways for no obvious reason.
Inspect the Clamp Socket Seat
Pull the blade out and shine a flashlight directly into the clamp head. Run your fingernail across the socket walls. Feel any pitting? A groove worn into the metal? If so, the socket has deformed past the point of cleaning. No amount of adjustment fixes a deformed socket — replacement is the only real answer here.
If the socket looks clean, the blade ends are your problem. Quality matters more than most people realize. Bosch, DeWalt, and Irwin all make pin-end blades with hardened steel pins. Generic blades deform fast — sometimes within a single project. One replacement set from a name brand runs twelve to eighteen dollars and outlasts three budget packs without question.
Check Pin Length and Diameter
Pins aren’t universal. Most modern saws use 0.125-inch pins. Older machines often need 0.156-inch pins or something custom entirely. Installing undersized pins in a socket built for larger ones creates a loose, rattling fit — and a blade that slips constantly. Measure your existing pins or dig out the manual before ordering replacements. Mixing gauges is basically a guarantee of blade slip. Skip past the mistake I made.
If the socket is worn and you decide to swap out the whole clamp assembly, budget forty to eighty dollars for a complete OEM replacement set. Pricey, sure, but OEM clamps hold tolerances tight. Some aftermarket clamps actually fit older machines better than the originals — apparently tighter manufacturing specs on the aftermarket side in some cases.
Fixing Blade Slip in Plain-End and Tool-Less Clamps
But what is a plain-end clamp system? In essence, it’s a slotted clamp head that grips a flat blade end using a set screw and clamp face. But it’s much more than that — it’s the standard design on almost every modern scroll saw sold today. Wen, DeWalt DW788, Makita, most hobby machines. No pins. Just a flat blade section pressed inside a slot.
Simpler to manufacture, cheaper to produce. Also prone to slipping once the clamp face wears smooth. Hundreds of blade changes polish that gripping surface until it’s practically a mirror. A shiny clamp face is a slippery clamp face. That’s what makes this failure mode so sneaky — the saw looks perfectly fine until it suddenly won’t hold anything.
Inspect and Resurface the Clamp Face
Open the clamp and look at the bottom surface — the part that actually contacts the blade. Does it shine? There’s your problem. Worn smooth.
Light roughening fixes it. I use 80-grit sandpaper and about ten slow strokes across the face. That’s all it takes to restore grip without adding enough bulk to affect seating. Some woodworkers prefer a flat file. Either approach takes five minutes and costs essentially nothing. If the face shows pitting or cracks, though, skip the sandpaper — the whole clamp assembly needs replacing at that point.
Correct Blade Seating Technique
The flat section of the blade end goes facing down inside the clamp slot. Push it all the way in — fully seated, not balanced on the slot’s edge. A blade resting too high contacts the clamp face at one corner only. Weak grip, guaranteed slip. Proper seating means the blade sits flat and square, with the clamp face pressing across the full width of that blade end. Takes an extra two seconds to check. Worth every one of them.
Tension matters here too. On plain-end clamps, you’re aiming for snug — firm enough that plucking the blade produces a clear tone, not so tight that you’re wrenching the set screw until something cracks. The deflection test in the next section gives you an exact way to verify this.
Tool-Less and Lever Clamps
Lever-style clamps ditch the set screw entirely. Flip or squeeze the lever arm, blade locks in. Faster, more convenient — and they fail differently than screw clamps. The lever pivot wears over time. The cam surface inside loses its grip. You end up with a lever that feels sloppy and won’t tighten no matter how hard you push it.
Check the pivot point where the lever rotates. Visible play? Sloppy feel? The pin is worn. Replacement levers run fifteen to thirty-five dollars and typically bolt on with one or two screws. Faster to replace than to keep chasing the problem with adjustments that won’t hold.
How to Test Blade Tension Before You Start Cutting
Before condemning the clamp, test your tension. This tells you immediately whether you’re under-tightening or dealing with actual hardware damage.
Blade installed, clamp tightened — press the blade sideways with one finger at the midpoint between both clamp heads. Good tension feels firm. Maybe a quarter-inch of deflection under moderate pressure, springs back instantly. Half an inch or more means too loose. Barely any movement means too tight. That’s a broken blade waiting to happen.
The deflection test is entirely tactile. You learn it in one attempt. If the blade moves too much but the clamp is already cranked tight and the face looks clean, the clamp is worn out. Replace it. If the blade has the right spring-back feel but still slips during cutting, the problem is usually a mismatched blade end or a dull blade dragging hard enough to pull itself free.
Under-tensioned blades skip teeth and snap. Over-tensioned blades fail right at the clamp. The sweet spot is real, and the deflection test finds it every time — for any clamp type.
When the Clamp Itself Is the Problem
Worth saying out loud. Sometimes cleaning and resurfacing just don’t cut it because the hardware is genuinely dead. Visible cracks in the clamp body. Pitting deep enough to catch your fingernail. Set screws that strip the moment you apply real torque. A lever that won’t tighten no matter what.
Replacement clamps are stocked by most major saw manufacturers. DeWalt, Wen, Makita, and Bosch all carry genuine parts. Expect fifteen to eighty dollars depending on the model and whether you go OEM or aftermarket. I’m apparently a DeWalt person — the OEM clamps work for me while generic aftermarket options never quite sit right — but on older machines the aftermarket versions sometimes hold tighter tolerances than the originals.
Most blade slips come from technique or gradual wear, not catastrophic clamp failure. Start with the inspection steps. Resurface before replacing. Replace only after you’ve ruled out everything else. That order saves money and usually solves the problem in under twenty minutes.


Stay in the loop
Get the latest the home woodshop updates delivered to your inbox.