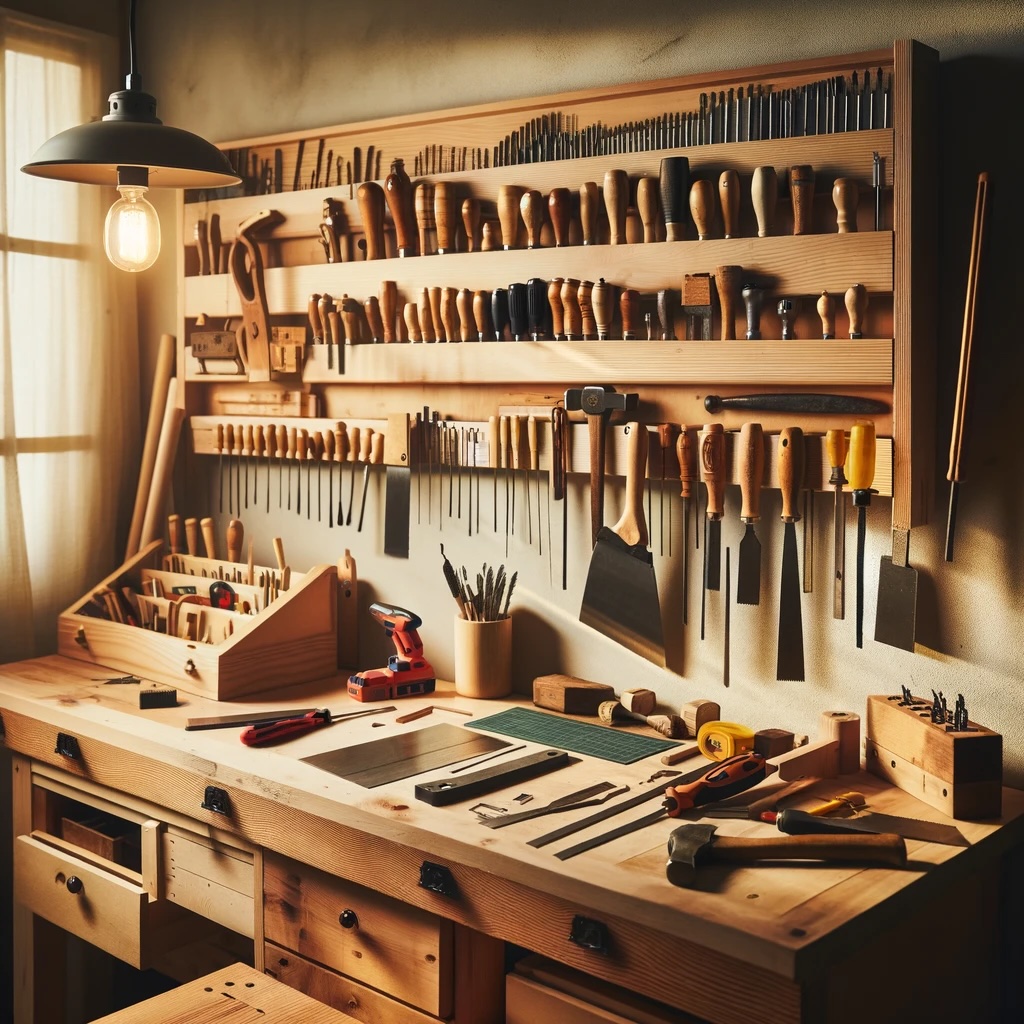

Thinking about getting into woodworking but not sure where to begin? Good news — you do not need much to start making real things. The barrier to entry is lower than most people think. What you do need is the right set of basics, and I mean basics in the truest sense: tools that handle the most common tasks without requiring a second mortgage.
1. Measuring and Marking Tools
Woodworking is just controlled geometry. Every cut, every joint, every assembled piece depends on accurate measurements made at the start. Get these right and the rest follows.
- Tape Measure: A 25-foot retractable tape is the standard. Buy one with a wide blade that locks rigid — it makes measuring long boards solo a lot easier.
- Ruler or Straightedge: A 12-inch steel rule does double duty — it checks flatness and draws lines that stay straight. Plastic flexes; steel does not.
- Square: A combination square is one of the most used tools in the shop. Check your 90-degree cuts, mark lines at consistent depths, and verify that things are actually flat.
- Marking Gauge: For joinery work, this thing is invaluable. Set it once, run it along the edge, and you get a perfectly consistent line every time.
2. Cutting Tools
Cutting is woodworking. Everything else is setup and finishing. Get comfortable with these and you can build almost anything.
- Handsaw: A quality 10-point crosscut saw handles most general cuts. Keep it sharp — a dull handsaw is miserable to use.
- Backsaw: The stiffened spine keeps the blade tracking true. Essential for dovetails and tenons where a wandering cut ruins the joint.
- Coping Saw: For curves and cutouts. Thin blade, replaceable. Useful for scrollwork and any interior cuts where a larger saw cannot maneuver.
- Chisels: Start with a set of four — 1/4, 1/2, 3/4, and 1-inch. Keep them sharp. A sharp chisel cuts; a dull one tears and slips.
3. Drilling and Boring Tools
Holes happen in woodworking constantly — for dowels, screws, hinges, and hardware of all kinds. Having the right drilling setup matters.
- Hand Drill: A brace with a set of bits handles most hole-boring tasks without needing power. Slower, yes — but also quieter, which matters in a shared space.
- Drill Bits: Twist bits for small holes, spade bits for larger bores, and a countersink bit for screw work. A basic set covers the majority of situations you will encounter early on.
4. Fastening Tools
Cut the pieces. Now hold them together. Simple concept, several tools involved.
- Hammer: A 16-ounce claw hammer handles nails and pulls them when the plan changes. Good balance matters more than most people realize until they have used a bad one.
- Screwdrivers: Both flathead and Phillips in multiple sizes. Some screws are in tight spots where a drill cannot fit — a hand screwdriver earns its place in any shop.
- Clamps: You need more of these than you think. Get at least four F-clamps and a couple of bar clamps before your first real project.
5. Finishing Tools
The difference between a rough build and a finished piece is entirely in the finishing tools. Do not skip this category.
- Sandpaper: Buy a range — 80, 120, 180, and 220-grit. Work through the grits in sequence. Jumping from 80 to 220 leaves scratches the finer grit cannot remove.
- Block Plane: A low-angle block plane fits in one hand and levels edges, trims joints, and cleans up end grain with precision a sander cannot match.
- Wood Files and Rasps: For curves and shaping work where a plane cannot reach. A half-round rasp handles convex and concave surfaces both.
6. Safety Equipment
The shop is full of things that can hurt you. Respect that fact from day one and build the habit early.
- Safety Glasses: Wood chips travel fast and aim for eyes. Wear them every session.
- Hearing Protection: Even moderate tool noise adds up over hours. Foam plugs or earmuffs — either works.
- Dust Mask: Fine wood dust is a real respiratory hazard. An N95 rated mask is the minimum for any extended sanding session.
7. Optional: Power Tools
Once you have some hand-tool projects under your belt and know what you actually want to build, power tools make sense. They are not shortcuts — they just handle volume and repetition better than hand tools.
- Circular Saw: The workhorse for breaking down sheet goods and rough lumber quickly.
- Jigsaw: Curves, cutouts, and shapes that no straight-blade saw can follow.
- Power Drill: Faster than a hand drill by an order of magnitude. With a good bit set, it handles most fastening and hole work in the shop.
- Orbital Sander: Cuts finishing time dramatically. I am apparently a slow hand-sander and the orbital works for me while hand-sanding alone never keeps up on large panels.
Where to Go From Here
Do not buy everything at once. Start with the measuring and cutting basics, build something, and figure out what you actually need next. Every woodworker’s kit looks different because every woodworker builds different things. Get the fundamentals, learn them well, and add from there. That is how the good shops get built — one tool at a time.


Stay in the loop
Get the latest wildlife research and conservation news delivered to your inbox.