Router straight edge cutting has gotten treated like a simple trick — clamp a board, run the router along it — when in practice the difference between a clean, accurate cut and a wandering mess comes down to details most guides skip entirely. As someone who has used a straight edge guide extensively for sheet goods breakdowns, cabinet panel work, and long rip cuts that a table saw can’t handle, I know where the process goes wrong and how to prevent it. Today, I will share it all with you.
But what makes a router with a straight edge guide worth understanding in detail? In essence, it’s one of the few practical ways to make accurate, clean long cuts in full sheets of plywood without a track saw or a properly set up table saw with a long fence. But it’s much more than just a workaround — with a well-made guide and proper technique, a router straight edge setup makes cuts that are cleaner than a circular saw and nearly as accurate as a track saw at a fraction of the cost.

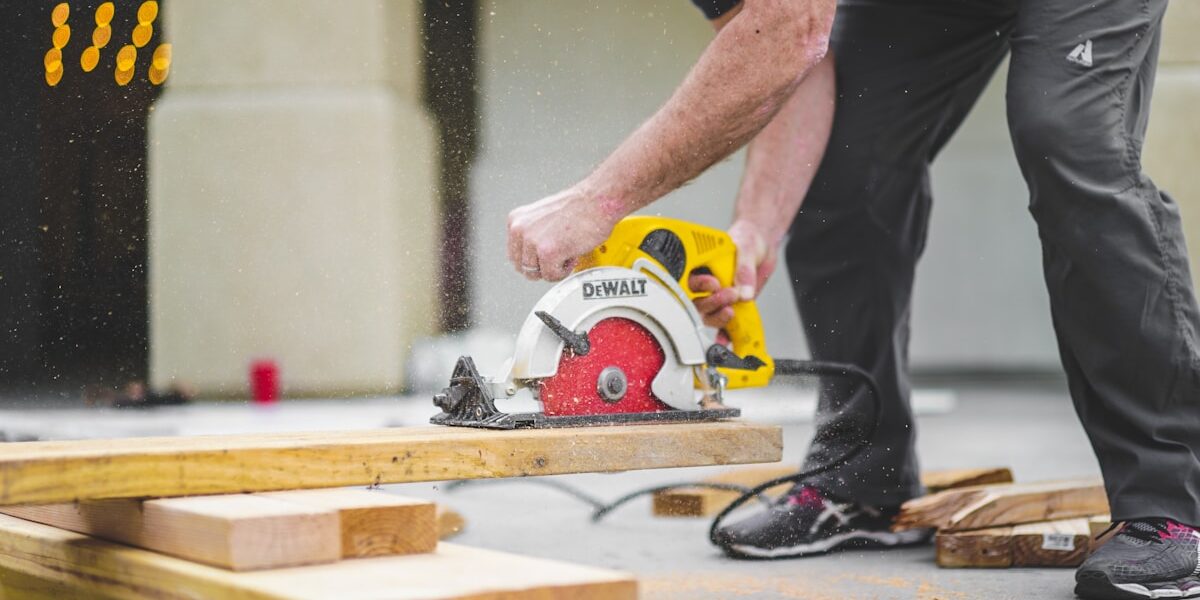
The Guide Itself: What Works and What Doesn’t
A straight edge guide is only as accurate as the guide itself. The guide’s reference edge — the face the router base bears against — must be genuinely straight. A warped or bowed guide produces a curved cut regardless of how careful your technique is.
Shop-made guides from a ripped length of MDF or plywood work well if you actually verify they’re straight after making them. Check the reference edge with a good straightedge or a quality level before trusting it. A commercial aluminum guide rail system (the Festool or Makita style) eliminates this variable entirely and adds the anti-chip-out rubber strip that produces cleaner exit cuts — but costs significantly more than a shop-made alternative.
The guide needs to be long enough to extend past both ends of the cut. The router needs firm contact with the guide at the start of the cut and at the finish. If the guide ends before the cut is complete, the router has nothing to follow — and it wanders.
Setting the Guide Offset
The guide doesn’t go where you want to cut. It goes at a distance from the cut line equal to the distance from the router bit centerline to the edge of the router base — the offset distance. Every router model has a different base diameter; measure yours specifically rather than assuming.
The reliable method: make a calibration cut. Set up your guide on scrap material, make a cut, and measure the actual distance from the guide to the cut edge. Use that measured offset for all subsequent layout. This accounts for base manufacturing variation and removes the assumption that the base is exactly the diameter the spec sheet claims.
Mark the cut line on your workpiece, then set the guide at the offset distance from the cut line. Clamp the guide at both ends — and in the middle if it’s a long cut. A guide that lifts or shifts mid-cut ruins the workpiece.
Bit and Depth Selection
A straight or spiral upcut bit works for through cuts in sheet goods. Spiral upcut bits clear chips efficiently and run cooler than straight bits. For chip-out sensitive work — face veneer on plywood — a downcut spiral bit pushes chips down and produces a cleaner top surface, at the cost of slightly slower chip clearing.
For sheet goods, a single pass at full depth is usually fine for 3/4″ material with a sharp bit and adequate router power. If your router labors — audible bogging, slowing down — take two passes. A laboring router produces heat, dull bits, and potential kickback. Taking two passes at 3/8″ each takes twice as long but produces better results and puts less stress on the tool.
Clamping and Workpiece Support
Sheet goods need support on both sides of the cut line throughout the cut. A sheet of plywood that drops as the cut completes will pinch the bit at the last moment, causing the router to kick back or the bit to grab. Set up sawhorses or foam insulation sheets under the full panel so both sides remain supported when the cut separates them.
Clamp the guide to the workpiece, not to the table or sawhorses. The guide needs to stay fixed relative to the workpiece; clamping to the support structure allows the workpiece to shift independently of the guide.
Feed Direction and Speed
The router bit rotates clockwise when viewed from above. For a standard climb-cut with the guide on the left side of the cut (guide to the left, cut to the right), feed the router from left to right — this is conventional feed direction, where the bit rotation helps pull the router into the guide rather than pushing it away.
Feed speed matters: too slow burns the wood and dulls the bit; too fast causes the router to bog and the cut to wander. The right speed produces clean chips and a consistent sound from the router — audibly loaded but not struggling. Find that pace on scrap before committing to the workpiece.


Stay in the loop
Get the latest wildlife research and conservation news delivered to your inbox.